To start the installation of MySQL on your Mac, you need to download it first. Here is a MySQL 5.6 download copy. There may be newer and better versions of MySQL, so depending on your preference, use your favorite browser to search for and download whichever version you prefer.
There are three ways of downloading and installing MySQL on Mac:
- Download via the website from MySQL and install it manually.
- Via Homebrew Mac https://brew.sh/index_de
- Via Docker https://hub.docker.com/_/mysql. This is actually the fastest and best way because you can easily switch between many versions and it takes 2 to 5min to get it up and running. But, we’ll cover that in another post.
Our focus is on the community version (recommended). On the download page, the system picks up your operating system automatically. If it does not pick your Mac OS automatically, you can choose your version before downloading it.
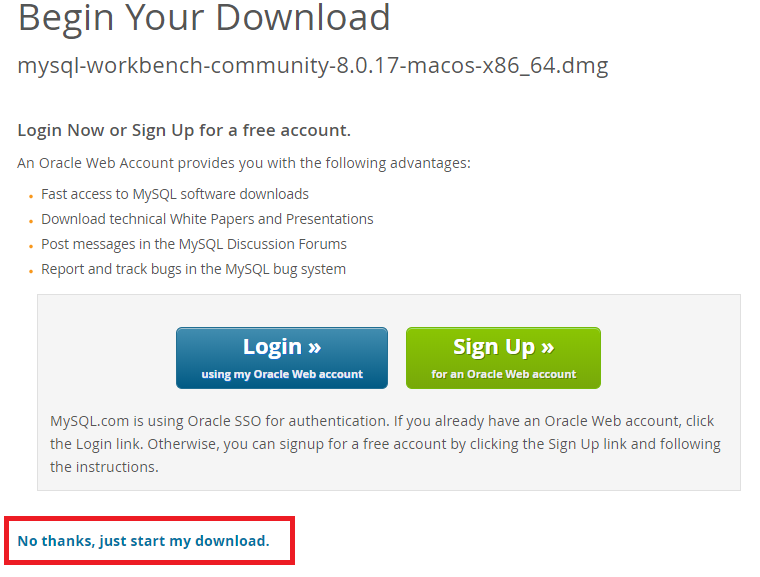
You will see three versions – DMG, TAR, and TAR Test Suite archives – choose the DMG archive. When you click the download button, it takes you to another page and asks you to sign up or log in. Instead, at the very bottom of the page, hit “No thanks just start my download”.
When the file has downloaded, double click on the .pkg file to launch the MySQL installer. Follow the prompts to install. At some point, it will ask you for your password – enter your Mac OS system password and click okay. The installation will start automatically.
On the pop-up window after MySQL installation, save the temporary password generated at installation. You will use that password when you first log into your Mac MySQL server.
The next step is confirming whether the installation was successful. Click on the apple icon at the top left of your desktop > system preferences. You should see the MySQL logo on the system preferences page which signifies the successful installation of your MySQL 5.6 download.
Open the application and click on the Start MySQL Server button to start the server. It will ask for your Mac password again and show that the server is now running. Now that your MySQL download Mac and installation is complete, the next thing you need to do is connect to your MySQL server.
In this post, we will briefly look at two ways of connecting to your MySQL server and access the database.
How To Connect To MySQL Server Via Terminal
The first task is to set your MySQL download mac location in the .bash profile. This will allow you to use one MySQL command from anywhere in your terminal that will be recognized and automatically connect you to your server.
To set the location, open the terminal and ensure you are in the home directory. Use the command:
to confirm you have a .bash profile. If you do not have one, use the command:
to create one. To open the profile, use:
and press enter.
Export the command:
to your bash profile. This is the location of your MySQL installation – save and close the file.
To connect to the server using the command line, open a new terminal and use the command:
The command will connect to your MySQL server as root using the password you saved after installation.
Once you connect to your MySQL download mac server for the first time on the terminal, change the password to the one you prefer using the command:
Change MyNewPass to your preferred password and hit enter.
You can verify your password change by opening a new terminal and attempting to connect to your server using the new login details.
How To Connect To MySQL 5.6 Download Server Using MySQL Workbench
On the downloads section of the MySQL website, scroll down to workbench and choose to download the DMG file. Once the file is downloaded, click on it to open. The next pop-up window will prompt you to drag MySQL Workbench to your applications folder. Proceed and wait for the copy to complete.
From your Mac’s launchpad or Applications folder, search for MySQL Workbench and launch the application. Once open, you will see a MySQL connection option with your MySQL server details given that your server is running. Once you click on the option to connect, it will prompt you to enter your MySQL server password.
Once you log in, you will be directed to the MySQL Workbench interface from where you can interact with your MySQL server.
With the simple steps above, you can download, install and interact with MySQL for Mac within minutes.