MySQL is a powerful relational database management system. But to start creating a database, tables, and add data, you need to run a couple of commands among them MySQL create table and MySQL create new database.
The MySQL create new database command helps you create a database – a container that will hold tables and their data. To create the tables, you use the command MySQL create table.
There are factors to consider with MySQL create new database:
- How many tables do you want in your database and how will you name the tables?
- How many columns will each table have and what will you name the columns?
- What type of data will each column store?
For the purpose of learning, we will stick to simple databases and tables. We’ll look at columns storing numbers exclusively, columns holding alphanumeric characters, text columns and binary files columns, and date and time columns. These are the common data types you will find in a typical table or database.
In this post, we will look at how to use MySQL create table to create tables and MySQL create new database to create databases. Later on, we’ll also look at MySQL restore database and see how we can restore databases from backups.
Creating A MySQL Database
Creating a MySQL database is simple and straightforward. You only need to use the MySQL create database statement and you will be well on your way to creating your very first MySQL database. When creating a database, you need to name it and supply the name of your database with the query in the MySQL client. While you can give your database any abstract name, we prefer using functional names.
Seeing that we are learning, let us use the database name ‘trees’. The database ‘trees’ will contain the information of employees. In MySQL client, enter the following command:

What this command does is that it creates a subdirectory named trees in MySQL’s data directory file system. This is where you will add tables and data later on. There is also an alternative command you can use whose results is the same as with the MySQL create database function. Instead of using the word DATABASE, you can use SCHEMA:

If you are familiar with MySQL, you know that the above is not the only syntax for MySQL create new database. When creating a database, you have the option of setting the default characters that your database will hold. For instance, instead of just creating a database as we have done above, you can use the following commands:

The above SQL statement is a single one but spread over two lines with the semicolon signifying the end of the statement. Line one is self-explanatory. Line two communicates to MySQL that Latin letters and other characters will be the default characters in the tables in the database trees. The third line sets the default data sorting method in tables to be based on Latin characters.
The standard practice after creating a database is confirming its existence in the server by listing the databases in the server with the following query:

If your MySQL installation is fresh, you will see a list of default databases that are created at installation and the trees database we have created. Before using MySQL create table to add tables to the new database you need to enter the following command to be able to use the database:
With the command above, you set the new database as the default database for the MySQL client. This enables you to add tables and data to the database until you leave the MySQL client or you change to a different database. By switching to the specific database that you want to add tables and data to, you are able to add data without having to specify the location of the database every time you want to add the data.
Creating Tables
Once your database is in place the next step of structuring it is creating tables. Creating tables in a database can be complicated but to start off with keep it simple. Restart by creating one main table and two smaller ones for reference. The main table will have more columns than the smaller ones. For the major trees table, we will create a table that will hold in the basic data for trees.
The MySQL create table command to start making the table is as follows:

The MySQL create table command above creates the table trees and adds five distinct columns where you will add your data. The column information is separated by a coma as we move to the next line and specify what the following column is about. Also to note is that the column statement is enclosed in parentheses. The details specified in each column above are namely column name, type, and its operational settings.
When naming the tables, you can use any name as long as it is not one of those reserved for SQL statements, a clause, or a function. If you use a reserved word, it has to be in quotes for SQL to recognize it as a table name and not a reserved keyword. Both MySQL and MariaDB have a list of data types for you to choose.
MySQL create table commands can create tables with up to 255 columns. However, smaller tables are easier to navigate, access, and they perform better than bigger tables. If you care for performance (speed) and accessibility, you are better off breaking up tables into smaller ones.
Table Columns
In our table, the first column is the identification number tree_id which is the primary key that dictates how the data will be indexed. By invoking the auto_increment command, MySQL will start with number 1 for the first list and increment it by a single digit unless we specify a different starting point.
The second column will have the trees scientific name. Scientific names are often very long and a mix of Latin and other languages. In this instance, our scientific name will have a variable character with as specified by VARCHAR. That means that the maximum number of characters any row in this column can accommodate is 255.
Should the scientific name have less than the maximum number of characters, the system reduces the column size for that particular row. What this means is that with VARCHAR, the engine does not know what to expect as lengths can vary at any point. On the other hand, with CHAR, the engine knows what to expect, and it automatically allocates the full width set for the row even when the characters are less than maximum. The two have tradeoffs given the different behaviors.
With a CHAR column, because the engine knows what to expect, tables run faster and indexing is easier. On the other hand, a VARCHAR column reduces the amount of hard drive space used as it varies the space it allocates. It is also less prone to fragmentation which improves performance.
Thus, if you are certain that a certain column will have a fixed number of characters, use CHAR and only use VARCHAR when you are not certain of the number of characters all entries will have in a certain column.
The third column will hold the common_name of the tree and has a variable but maximum character count of 50. The second last column will hold the trees family_id in integer data type. You can then create another table and join the two tables. When joining them, you can use the numbers to identify the trees family and then link each tree to its family.
Our fifth column above is a TEXT data type column that allows us to input a lengthy description of the tree. The column has a variable width and each row can hold a maximum of 65,535 bytes of data. With this amount of space, you can write a few pages describing the tree and store in in the respective row in the column.
Other than the features we have on our table, there are many others we can use to identify or describe the trees on our list. Also, there are many other data types than we have used on our table. You can even create a column that can store binary data such as an image of the tree or its leaf structure.
Now that you have created your table, confirm whether it is functional:
The engine will display the results in table format made with ASCII characters. While it does not look slick, it is clean, quick, and outlines the information for easy readability.
Deleting A MySQL Table
If you realize that you made a mistake creating a table with the MySQL create table command, you might need to drop it. To undo a MySQL create table command, you can use the statement – DROP TABLE table-name. The MySQL drop table command will delete a table and all its data. A word of caution though – the statement purges the table and all its contents and it is not reversible.
Additionally, rather than delete a table, you can use the ALTER TABLE statement to change your table’s structure.
PRO TIP: If you realize you have made a mistake, you can drop a table and use the up and down arrows to move through previous commands. Once you get to the initial MySQL create table command, use the front and back arrows to go to the section you want to alter, change whatever you want, and hit the enter key. That action will recreate the table with or less the additional details.
MySQL Insert Data
After creating the database and adding a table to it, the next step is inserting data into the table. For this, use the statement below:
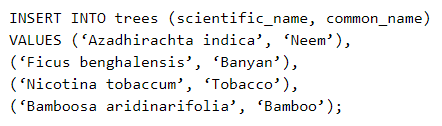
The statement above will create four rows of data for four trees. To see the contents of the table, enter the command:

The resulting table will have two values in the specified columns – scientific and common name. The rest of the columns will have NULL as their default value.
NB: NULL values in SQL do not mean zero, they mean the data is not available.
MySQL Database Backup
A neat feature in MySQL is MySQL restore database. The MySQL restore database is especially handy when you have a backup of your database. When creating a database with MySQL create new database and adding tables with MySQL create table command, you want to keep a copy of the database in case something goes wrong and your database is compromised.
But to run a MySQL restore database command, you need a backup of your database which is where Ottomatik excels. With our service, restoring your database with MySQL restore database is a breeze.
For starters, our backup and restore feature allows you to create a custom schedule that routinely backups your MySQL database. You also get to choose how your backup is conducted. One of the major benefits for high-traffic websites is that Ottomatik offers zero database downtime.
Regardless of how you want to back up your database, Ottomatik’s mysqldump backups are designed to handle all scenarios.
Another cool and highly-practical feature that Ottomatik offers you is the simple capability to backup files and directories that helps you specify full paths or use complex functions to match patterns in powerful ways. Backing up files and directories can be an uphill task as there are rules around including and excluding certain files during backup. Ottomatik makes this process a breeze so that your MySQL restore database sessions are seamless.
Command Line Backup
The general syntax of backing up a MySQL database with mysqldump is:

The command creates a plain text file as a backup for your database. Once you create a database backup, it is always good practice to MySQL restore database on another server to see whether the database works.
The username is the database user’s name, the –p is for password followed by the name of the database you want to back up, and lastly is the filename for the database backup. The –opt at the beginning of the query is the mysqldump option.
In the case of backing up our trees database, we would:

You can even backup specific tables. For instance, if you have videos and audio tables in your database, you can back those tables only:

What about backing up two databases at once? To do this, use the — database option as follows:

MySQL Database Restore
The MySQL restore database process involves two steps that are fairly simple. The first of these steps is creating a new database into which you will restore the backed up database. The MySQL create new database syntax is as follows:

As you can see, to create a new database, you need root privileges. The second process is where we input the MySQL restore database statement to invoke a database restore. When restoring a database, you do not need to create any tables in the new database with MySQL create table. The restore process populates the new database with the tables and data that was backed up.
There are a number of ways you can restore a MySQL database. Assuming you have a backup ready and a new database, this is the command to run for you to restore the database:

Sometimes, you might need to restore an already existing database. To do this, you will need to import the database as below:

As you can see, there is a lot you can do with MySQL databases and tables once you learn how to create MySQL databases and tables and use them. At this point, you should be a pro at backing up and restoring your database. While there are still other ways to do this, above are the simplest and fastest. For zero-downtime backups, check out Ottomatik.