Enter the MySQL Command Line
To carry out these activities, you must have root access to the MySQL command line. Just enter the following lines bellow:
Then use the command below if your administrator account requires a password:
You may now execute the following activities from the MySQL command line now that you're logged in.
How Do I Make a User?
When creating a user, you must consider three factors:
- username
- password
- hostname - If you only need to access this database locally use the value "localhost"
The line would look like this if you combine those three factors:
If you want a user to only be able to access your database from a certain I, use the following:
Where 20.1.0.4 is the IP the user will be able to access the database.
How to show all MySQL users
Use the following statement to list all users on your MySQL instance:
Understanding MySQL Privileges
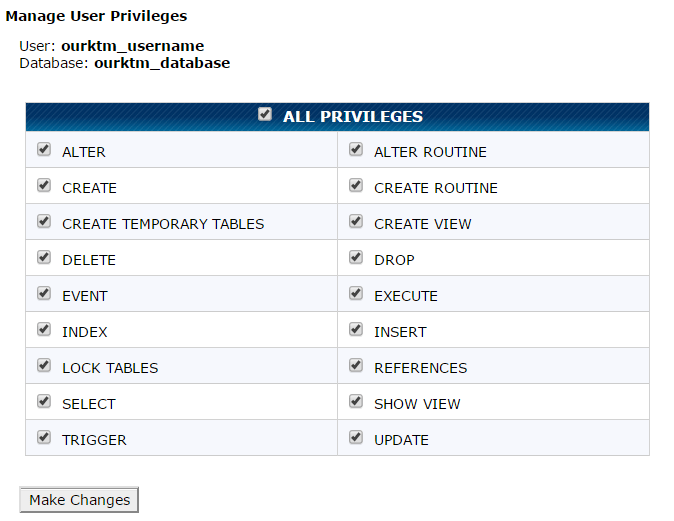
MySQL privileges allow you to specify which activities a user has permission to do on your MySQL instance. As seen in the picture below, these permissions may be granularly scoped on certain actions and resources.
Here is an image on what are the possible privileges a User can have:
MySQL privileges can be defined at two levels:
- Global Privileges: Administrative and privileges that apply to all databases.
- Database Privileges: These are privileges granted to certain databases
MySQL offers a large granularity of privileges some of which are: ALL PRIVILEGES, INSERT, SELECT, UPDATE, DELETE, CREATE, ALTER.
The most common permissions are:
- CREATE – Allows users to create databases/tables
- SELECT – Allows users to read data
- INSERT – Allows users to insert data
- UPDATE – Allows users to update existing data
- DELETE – Allows users to delete data
- DROP – Allows users to drop databases/tables
How to Give a MySQL User ALL Privileges
In some instances, you may wish to provide a MySQL User complete access, which may be accomplished as follows:
Replace database name with your database name, username with your user name, and hostname with your IP address or hostname (as described above).
It's important to note that, in most circumstances, and for obvious security reasons, you'll only need to assign particular capabilities to a given user on a single database.
How to Delegate Permissions to a MySQL User
Using the following sentence, you may assign a user one or more privileges:
Display the Rights Assigned to a MySQL User
The SHOW GRANTS statement may be used to show all rights granted to a user:
SHOW GRANTS FOR “username”@”localhost” ;
This will output something like:
+-----------------------------------------------------------------------------+
| Grants for username@localhost |
+-----------------------------------------------------------------------------+
| GRANT USAGE ON *.* TO 'username'@'localhost' |
| GRANT ALL PRIVILEGES ON 'database'.* TO 'username'@'localhost'.|
| REVOKE ALL PRIVILEGES ON * . * FROM 'username'@'localhost'; |
+-----------------------------------------------------------------------------+
3 rows in set (0.00 sec)
Remove a MySQL User's privileges
The following command may be used to remove privileges from a MySQL User:
REVOKE permission_1, permission_2 ON database_name.table_name FROM 'username'@'localhost';
You may substitute the permissions you wish to cancel for permission_1, permission_2 (like INSERT, SELECT).
You can remove all privileges with a single command, as seen below:
We hope you find this instruction to be useful and simple to follow! Understanding the fundamentals of MySQL user rights is critical. So, just follow the procedures given above and keep to the default MySQL user and database settings, and you'll be OK.